When it comes to home improvement projects, few updates can transform a space as dramatically as new flooring. Tile flooring is a versatile, durable, and stylish option for nearly every room in your home, from kitchens and bathrooms to living areas and hallways. Whether you’re renovating your home or building from scratch, understanding the process of floor tile installation is essential to achieving the best results. This guide will provide an in-depth look at everything you need to know about floor tile installation, from planning to execution.
1. Types of Floor Tiles
The first step in the tile installation process is choosing the right type of tile for your needs. There are several types of floor tiles available, each with its own set of advantages. Some of the most popular options include:
- Ceramic Tiles: One of the most common and affordable types, ceramic tiles are available in a wide range of colors, sizes, and finishes. They’re easy to clean, resistant to moisture, and perfect for bathrooms and kitchens.
- Porcelain Tiles: A more durable and water-resistant option than ceramic, porcelain tiles are often used in high-traffic areas. They can be more expensive but are excellent for areas that experience heavy foot traffic or moisture exposure.
- Natural Stone Tiles: Granite, marble, and slate tiles offer a luxurious look and feel. However, they tend to be more expensive and may require additional maintenance. Natural stone tiles are ideal for creating elegant and timeless spaces.
- Vinyl Tiles: For a budget-friendly option that still mimics the look of traditional tile, vinyl tiles are a great choice. They’re waterproof, easy to install, and come in a variety of styles that resemble wood or stone.
- Mosaic Tiles: These small tiles come in a wide variety of materials and patterns and are often used to create intricate designs. Mosaic tiles are ideal for creating accent walls, borders, or artistic focal points in a room.
2. Preparing for Tile Installation
Proper preparation is key to a successful tile installation project. Here’s what you need to do to get ready:
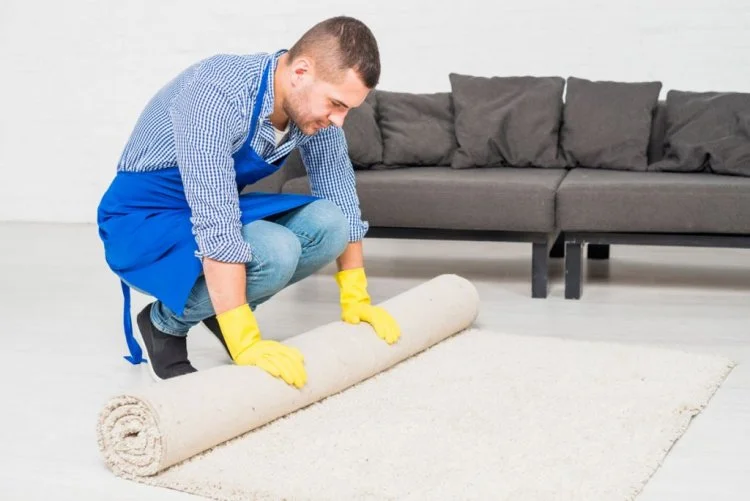
- Remove Old Flooring: If you are replacing existing floors, you’ll need to remove the old flooring material. This can be a labor-intensive step, especially if you’re working with vinyl, carpet, or glued-down tiles. Be sure to clear the area completely before beginning the installation.
- Prepare the Subfloor: The subfloor (the surface beneath the tile) must be level, clean, and dry. Any imperfections or debris can affect the installation process, so it’s important to fix cracks or rough patches beforehand. Depending on the type of tile, you may need to install a backer board to ensure a smooth, stable surface.
- Plan Your Layout: Before starting the installation, plan the layout of your tiles. Start by finding the center of the room and work outward to create a symmetrical design. It’s also important to decide whether to use full tiles around the edges or cut tiles to fit along the perimeter of the room.
3. Tile Installation Process
The actual tile installation process involves several steps. If you’re doing it yourself, follow these general steps for a smooth installation:
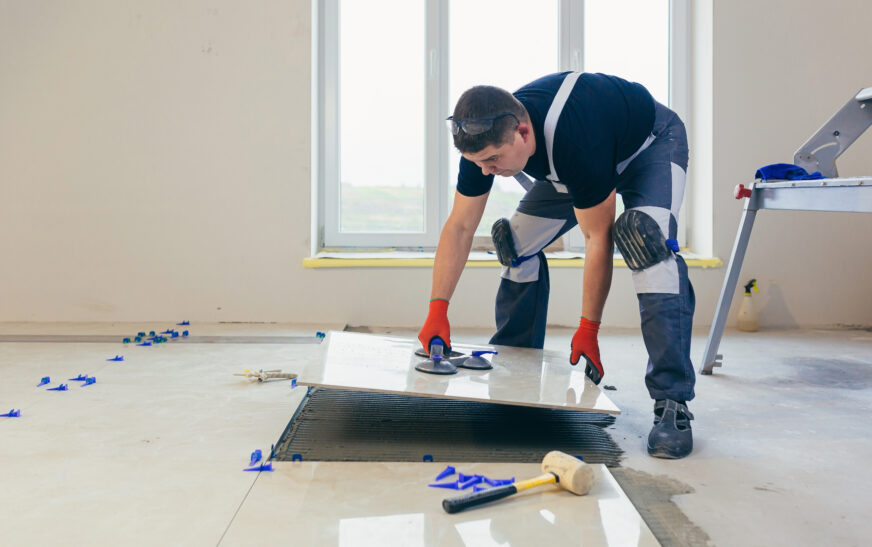
- Apply Mortar: Using a trowel, spread tile adhesive (thin-set mortar) on the subfloor in small sections. Work in manageable areas to prevent the adhesive from drying before you place the tiles. Make sure to comb the mortar to create even ridges that will help secure the tiles.
- Place Tiles: Press each tile into the mortar, using a slight twisting motion to ensure a strong bond. Use spacers between tiles to ensure consistent gaps for grout. Continue laying tiles, working your way outward from the center of the room.
- Cut Tiles: You’ll likely need to cut tiles to fit around edges, corners, and obstacles like plumbing fixtures. A tile cutter or wet saw will help you achieve precise cuts. Always measure carefully before making any cuts.
- Allow Mortar to Set: Once all tiles are in place, allow the mortar to dry and set for at least 24 hours before proceeding with grouting.
- Grout the Tiles: After the mortar has set, remove the spacers and begin applying grout between the tiles using a rubber float. Press the grout into the gaps, ensuring they are filled completely. Wipe away excess grout with a damp sponge, working in a circular motion.
- Clean and Seal: Once the grout has dried, clean the tile surface with a cloth to remove any grout haze. Depending on the type of tile and grout used, you may need to apply a sealer to protect the surface and enhance its durability.
4. Hiring a Professional for Tile Installation
While some homeowners may choose to tackle tile installation as a DIY project, it’s often best to hire a professional for a flawless result. Professional tile installers bring expertise, tools, and experience that can save you time and effort. They can also ensure that the job is done correctly and efficiently, preventing costly mistakes down the line.
When hiring a professional tile installer, consider the following:
- Experience: Choose an installer with extensive experience in floor tile installation, especially for the type of tile you are using. A professional with a good track record can ensure that the tiles are laid properly and securely.
- Licensing and Insurance: Ensure that the installer is licensed and insured. This protects both you and the contractor in case of accidents or damages during the installation process.
- References and Reviews: Ask for references or check online reviews to gauge the quality of the installer’s work. Look for an installer with a solid reputation for reliability and high-quality craftsmanship.
- Cost Estimates: Request a detailed, written estimate before the work begins. This will help you understand the total cost of the project, including labor, materials, and any other associated expenses.
5. Maintaining Your New Tile Floor
Once your floor tiles are installed, it’s important to maintain them to ensure they last for years to come. Regular cleaning and maintenance can keep your tiles looking fresh and new.
- Regular Cleaning: Sweep or vacuum your tiles regularly to remove dust, dirt, and debris. For a deeper clean, use a mild detergent or tile cleaner with warm water.
- Grout Care: Grout can accumulate dirt and discolor over time. Clean grout lines periodically with a grout cleaner or a mixture of vinegar and water. Be sure to reseal grout every few years to prevent staining and moisture penetration.
- Protective Measures: Use floor mats in high-traffic areas to minimize wear and tear. Consider placing furniture pads under legs of heavy furniture to prevent scratches and chips on the tiles.
Conclusion
Whether you’re renovating your home or installing new flooring in a new build, floor tile installation is a fantastic way to add style and durability to your space. From choosing the right tile to ensuring a flawless installation, careful planning and execution are essential for achieving the best results. If you’re looking for professional assistance, be sure to find a reliable provider who can ensure your installation is done to the highest standards. For residents in the area, Tile Installation Services in Rochester are available to help you transform your home with beautiful and lasting floor tiles.